
By Jenny Wang,
Having a good stock of fast, easy recipes is probably the most important part of saving time in the kitchen. Here are two of my favorite recipes to help you start or grow your own collection:
No Knead Flat Bread

No knead flatbread, toped with pear, gorgonzola and arugula. Courtesy of steamykitchen.com.
(also good for pizza crust)
- 1/8 cup extra virgin olive oil
- 1 3/8 cup lukewarm water
- 2 1/4 teaspoon granulated yeast
- 2 1/4 teaspoon salt
- 1 1/2 teaspoon sugar if desired
- 2 1/2 to 3 1/4 cup all-purpose flour depending on how thick you like the dough.
- The day before, mix oil, water, yeast, salt (and sugar if using) in a large bowl. Then, mix in the flour. This is a no knead dough so it will be quite a bit stickier than normal bread doughs. Make sure there is room in the bowl for the dough to rise to two or three times its original volume.
- Leave the dough at room temperature for about two hours to rise. After it has risen, you can store the dough in the fridge (cover the bowl with plastic wrap) for up to a week. It may develop a beer-like smell (due to the live yeast) if you store it for too long, but it should still cook up fine. The dough can also be frozen if necessary. I like to prepare the dough in a large tupperware for easy storage.
- To cook, line a baking tray with parchment paper and spread a fist-sized chunk of dough on the paper. The parchment paper prevents the dough from sticking to the baking tray and makes clean up a lot easier. Spread the dough as thin as you can without making holes.
- Gently brush the dough with olive oil if you’d like. You can also add toppings like shredded cheese and arugula. Essentially, anything that works well on pizza should work here.
- Bake in the oven at 500 degrees Fahrenheit for 8 to 15 minutes until the dough is cooked through. If your oven doesn’t go this high, use the highest temperature setting and bake for a bit longer. The first few times you try this recipe, check on the bread during baking to make sure it doesn’t burn.
Easy Miso Soup
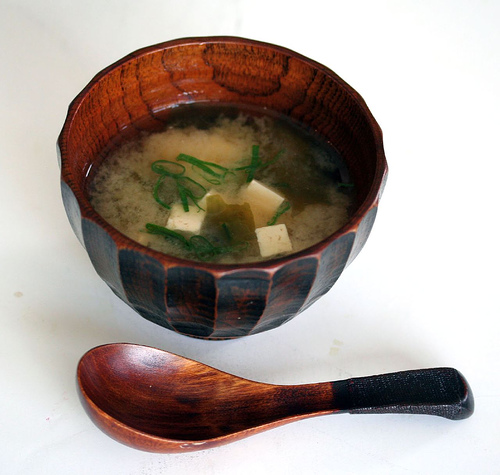
Miso Soup. Courtesy of www.steamykitchen.com.
Traditional miso soup is make from dashi (fish stock) and miso (fermented soy bean paste), but there are now plenty of packaged instant soup mixes. However, by adjusting the traditional recipe, you can make miso soup from scratch just as easily as from commercial mixes. The ingredient amounts are not critical in this recipe so you can adjust to suit your own tastes.
- 1/2 teaspoon bonito flakes (can omit if you don’t have it, but it gives the soup a more complex flavor)
- 2 teaspoon miso paste (I like white miso for this, but you can also try other types for a different flavor)
- 1 teaspoon dried wakame seaweed
- chopped scallions, cilantro, and/or other herbs for flavoring
- 2 cups hot water
* bonito, miso, and wakame can all be found in Chinatown or Whole Foods.
- Set the water to heat before prepping the rest of the soup. If you have one, an electric kettle is likely the fastest way to heat water. Microwave and stove top works too. The water should be very hot, but doesn’t have to be boiling.
- Mix the miso paste with a bit of water to soften it. If you don’t use miso much, just soften the miso directly in the soup bowl. I make this soup a lot so I just keep a jar of softened miso in the fridge and add a couple spoonfuls to the soup bowl. In it’s original form, miso paste will last months in the fridge. The softened miso doesn’t last as long, but should stay good for at least a couple weeks.
- Crush the bonito flakes as small as you can into the soup bowl.
- Add in the wakame and herbs. Although not authentic, I like to add some Thai basil and vinegar. Feel free to experiment with herbs or to leave them out altogether.
- Pour the hot water into the soup bowl. The hot water will rehydrate the wakame and cook the herbs slightly to draw out more flavor. If the water cools too quickly to properly rehydrate the wakame, cover the bowl. Once the wakame softens, the soup is ready.
This recipe also makes a good base for noodle soups.